
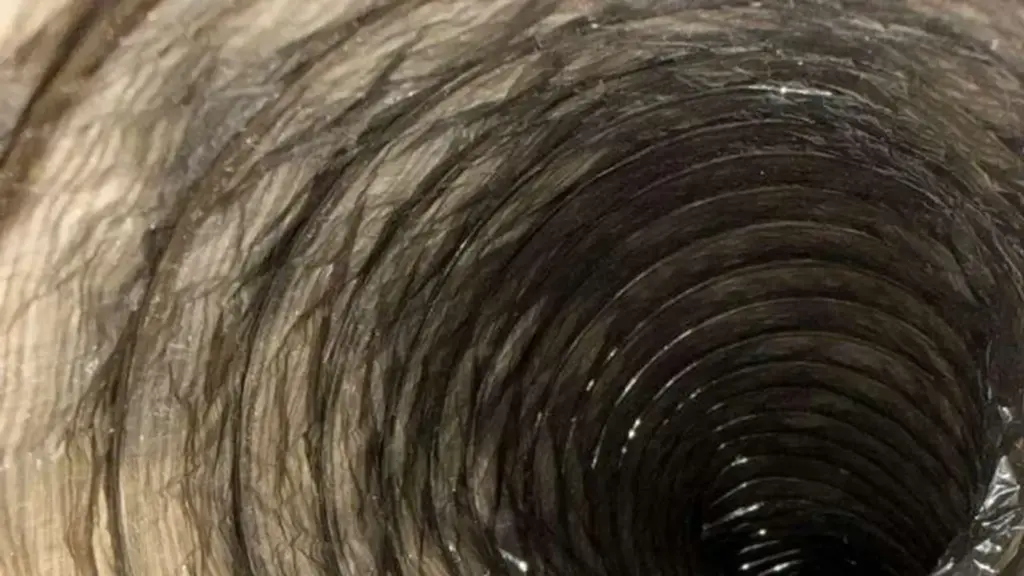
Warning Signs You Need Dryer Vent Repair in Tampa (And What to Do Next)
A damaged dryer vent rarely announces itself loudly. Instead, it works quietly against you: lint backs up, heat has nowhere to go, and your dryer strains harder with every cycle. In Tampa’s humid climate, that backed-up moisture and lint mixture doesn’t just stay in the vent. It can migrate into attic spaces and, from there, into leaky duct systems throughout your home, compounding indoor air quality problems that eventually make professional air duct cleaning necessary. Catching vent damage early keeps a manageable repair from becoming a much larger project.
This guide walks you through exactly how to recognize the warning signs, what to check before calling a technician, and when a repair is beyond DIY territory. Tampa homeowners face specific challenges here, so the steps below are written with this market in mind.
Before You Start: What You’ll Need
- A flashlight or phone torch
- A timer or stopwatch (to test drying cycle length)
- A lint trap and the area around it, cleared for inspection
- Access to the exterior vent cap (usually on an outside wall or soffit)
- A notepad to log what you find at each step
- Work gloves if you plan to handle any vent sections
You do not need tools to complete this inspection. The goal is observation, not disassembly. If you find damage, that is when a licensed technician takes over.
Step 1: Time Your Next Full Drying Cycle
The single most reliable early indicator of a restricted or damaged dryer vent is a drying cycle that takes noticeably longer than it used to. A properly vented dryer should dry a standard load of laundry within roughly one cycle. If you find yourself running the same load twice, or if cycles that once finished in under an hour are now stretching well past that, the vent system deserves a close look.
In Tampa, this symptom often appears first in summer. The combination of high ambient humidity and a compromised vent means moisture-laden air has even less ability to escape, so the dryer’s moisture sensors keep the machine running. Log the cycle time now so you have a baseline to compare against after any repairs are made.
Step 2: Check the Exterior Vent Cap for Blockages and Damage
Go outside and locate the vent termination point, typically a louvered or flap-style cap mounted on an exterior wall, under a soffit, or through the roof. With the dryer running, you should feel a steady, warm airflow pushing the flap open. If the flap barely moves, stays shut, or rattles irregularly, something is restricting or redirecting airflow.
Common issues at the cap include:
- Lint matted against the screen or flap (screens are not recommended on dryer vents for exactly this reason)
- A flap stuck open year-round, which lets humid Tampa air and pests back into the duct
- Physical damage from a lawnmower, pressure washer, or storm debris
- A cap that has separated from the wall and is no longer sealed, allowing hot air to exhaust into the wall cavity instead of outside
Do not attempt to climb onto a roof to inspect a rooftop termination. Note what you can see from the ground and report it to your technician.
If you want it handled correctly the first time, consider professional air duct cleaning in Tampa.
Step 3: Inspect the Lint Trap Housing and the Area Behind the Dryer
Pull the lint trap out and look down into the housing with your flashlight. A thin coating of lint is normal. A thick mat, visible debris accumulation, or lint that has bypassed the trap entirely and settled into the housing cavity suggests the trap is no longer seating correctly or the vent connection behind the dryer has loosened.
Next, carefully pull the dryer a few inches away from the wall (unplug it first) and inspect the flexible transition duct that connects the back of the dryer to the wall duct. Look for:
- Kinks, sharp bends, or crushing from the dryer being pushed too close to the wall
- Tears, holes, or sections that have separated from their clamps
- Foil accordion-style duct that has stretched or collapsed (rigid or semi-rigid metal duct is the preferred material)
- Lint visible on the floor or wall directly behind the dryer, which indicates a gap in the connection
This is one of the most common repair points, and it is also one of the reasons lint ends up in places it should never reach. When lint escapes here, it can travel into wall cavities and attic spaces, eventually finding its way into the broader duct network and affecting the indoor air quality throughout your home.
Step 4: Notice Smells, Heat, and Humidity Inside the Laundry Room
Run the dryer for ten minutes and pay attention to what you sense in the laundry room itself. A well-functioning vent system sends heat and moisture outside. A damaged one redirects them back into the room.
Warning signs to note:
- A burning or hot-dust smell: This can indicate lint accumulation inside the duct that is getting warm enough to scorch. This is a fire-risk signal that warrants immediate attention.
- The laundry room feels noticeably hotter than the rest of the house: Exhaust heat is staying inside instead of venting out.
- Condensation on walls, windows, or the dryer surface: Moisture-laden exhaust air is being released into the room rather than expelled. In Tampa’s already-humid environment, this accelerates mold-friendly conditions faster than in drier climates.
- A musty odor that lingers after the cycle ends: Moisture trapped in a damaged duct section can support microbial growth over time.
If you notice a burning smell, stop the dryer immediately and do not run it again until a technician has inspected the full vent run. This is not a wait-and-see situation.
Step 5: Look for Physical Damage Along the Duct Run
If your duct run passes through accessible spaces, such as a utility closet, a basement (rare in Tampa, but some split-level homes have them), or an open attic section, do a visual walk of the route. You are looking for:
Many Tampa homeowners rely on expert air duct cleaning in Tampa for exactly this.
- Sections of duct that have separated at joints or elbows
- Duct that has been crushed by stored items
- Foil duct that has torn or been punctured
- Evidence of pest activity: small holes, gnaw marks, or nesting material
- Duct that has sagged and pooled lint in low spots
Tampa attics are particularly harsh environments. Summer attic temperatures regularly reach levels that degrade lower-quality flexible duct materials faster than in cooler climates. A duct run that looked fine a couple of years ago may have developed cracks or separations simply from repeated thermal expansion and contraction. This is also why a disconnected dryer vent in an attic is a compounding problem: the hot, lint-laden air it dumps into that space can enter your home’s air handler system and make ac duct cleaning a more urgent need than it would otherwise be.
Step 6: Consider the Age and History of the Installation
Ask yourself a few questions about the existing vent system:
- How long has the current vent been in place, and has it ever been professionally inspected?
- Was the dryer moved or replaced without rerouting the vent?
- Did a previous owner install the vent, and is the routing logical (shortest path to the exterior)?
- Has the home had any renovation work that may have disturbed the duct run?
In Tampa’s housing stock, which includes a significant number of homes built during the post-war boom through the 1980s, original vent installations are sometimes routed through long, convoluted paths that were marginal even when new. Over decades, joints loosen and materials degrade. If you do not know the installation history, treat the system as uninspected and schedule a professional assessment. You can also review common dryer vent installation mistakes in Tampa to understand what a substandard original installation might look like.
Step 7: Assess Whether the Vent Material Is Appropriate
Not all dryer duct materials are equal, and older or improperly installed systems sometimes use materials that are no longer considered appropriate for dryer exhaust. Thin, ribbed plastic duct is one example: it accumulates lint easily in its corrugations and can degrade with heat over time. If your visible duct sections are plastic or very thin foil accordion-style material, that alone is worth flagging for a technician.
The preferred material for most dryer vent runs is rigid or semi-rigid metal duct. It resists crushing, accumulates less lint in its smoother interior, and holds up far better in Tampa’s heat. If your system uses substandard materials, repair often means replacement of those sections, which is a straightforward job for a professional but not something to attempt without the right fittings and knowledge of local code requirements. Requirements vary by jurisdiction, so confirm specifics with a licensed technician familiar with Tampa-area building standards.
When to Call a Professional in Tampa
Some of what this guide covers is observation, and observation is something any homeowner can do safely. But several situations call for a professional rather than a DIY fix:
Ready for the next step? Learn how air duct cleaning services in Tampa can help and reach out to the team.
- Any burning smell during operation. Stop the dryer and call immediately.
- Duct sections that have separated inside a wall cavity or attic. Accessing and resealing these requires proper tools and, in some cases, permits.
- A vent run that exceeds straightforward length or has multiple elbows. Improper repairs on complex runs can restrict airflow further.
- Visible pest damage or nesting material inside the duct. This requires sanitization, not just a patch.
- Any situation where the duct terminates in an attic, crawl space, or wall cavity instead of outside. This is a code violation in virtually every jurisdiction and a serious fire and moisture risk.
- If you are uncertain about any finding. A professional inspection takes a short amount of time and removes the guesswork.
Ecovent Dryer Duct Solutions serves Tampa homeowners with dryer vent repair, inspection, and rerouting. If your inspection turns up any of the issues described above, reaching out for a professional assessment is the logical next step. It is also worth noting that a compromised dryer vent and a dirty duct system often go together, so pairing a vent repair with a review of your home’s broader duct health can be efficient. See our complete guide to air duct cleaning in Tampa for context on how these systems interact.
For homeowners who want to understand the full picture of dryer vent safety before scheduling service, the Tampa dryer vent fire safety checklist is a useful companion to this guide. And if you are weighing whether routine cleaning is also overdue, this breakdown of whether dryer vent cleaning is worth it in Tampa can help you decide.
Frequently Asked Questions
How do I know if my dryer vent is damaged versus just dirty?
A dirty vent typically shows up as longer drying times and lint buildup at the exterior cap, but the duct itself is intact. A damaged vent adds symptoms like heat or moisture escaping into the laundry room, visible gaps or tears in the duct, or lint found in places it should not be, such as behind the dryer or in the attic. In practice, many vents are both dirty and damaged, which is why a professional inspection evaluates both conditions at once.
Can I repair a dryer vent myself?
Minor issues, like reconnecting a transition duct that has slipped off its clamp at the back of the dryer, are within reach for a careful homeowner. However, repairs inside walls, attics, or involving the exterior termination point are best handled by a professional who can verify the full duct run is correctly sealed and meets local requirements. Improper repairs can restrict airflow or leave gaps that create fire or moisture risks.
How often should a dryer vent be inspected in Tampa?
A professional inspection once a year is a reasonable baseline for most Tampa households. Homes with heavy laundry use, longer vent runs, or older installations may benefit from more frequent checks. Tampa’s heat and humidity accelerate material degradation and create conditions where moisture-related damage can develop faster than in cooler, drier climates.
What happens if a damaged dryer vent goes unrepaired?
Over time, a damaged vent allows lint to accumulate in places it cannot be easily cleaned, raising fire risk. It also allows heat and moisture to enter wall cavities, attic spaces, and potentially the home’s air handler duct system, which can worsen indoor air quality and increase the workload on your AC system. What starts as a repair need can grow into a more involved remediation project.
Does a dryer vent repair require a permit in Tampa?
Permit requirements depend on the scope of work and local jurisdiction. Simple repairs to accessible duct sections often do not require a permit, but rerouting a vent run or modifying the termination point may. Requirements vary, so confirm with your technician or the local building department before work begins.
The Bottom Line for Tampa Homeowners
A dryer vent that is damaged, disconnected, or simply worn out does not stay a contained problem. In Tampa’s climate, the heat and moisture it releases find their way into your home’s structure and air systems faster than they would in a more forgiving environment. The warning signs covered in this guide, from longer drying times and exterior cap issues to burning smells and laundry room heat, are the system telling you something is wrong before the consequences become harder to address.
If your inspection turned up any of these signs, contact Ecovent Dryer Duct Solutions to schedule a professional evaluation. Catching a repair early is almost always simpler and less disruptive than addressing the downstream effects of a vent that has been failing for months.