
Why Dryer Vent Installation Standards Matter for Tampa Home Safety
A clothes dryer is one of the hardest-working appliances in any Tampa home, and the vent system behind it is often the most overlooked. When that vent is routed incorrectly, built from the wrong materials, or simply never inspected after installation, the consequences range from a dryer that takes two cycles to dry one load to a genuine fire hazard inside your walls. This guide breaks down what proper dryer vent installation actually requires, why Tampa’s building environment adds its own complications, and how to know when your current setup needs attention.
The Real Risk Behind a Poorly Installed Dryer Vent
Why Lint Is the Problem, Not the Dryer Itself
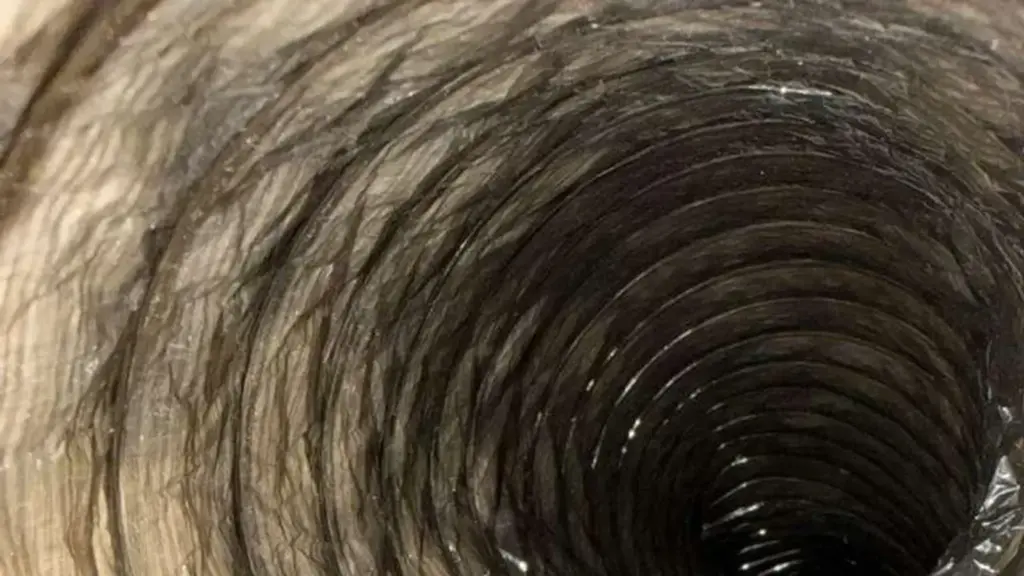
Most people assume dryer fires start with a mechanical failure. The more common culprit is lint accumulation inside a vent that was never designed to handle the airflow load placed on it. Lint is highly combustible. Every load of laundry pushes fine fibers through the duct, and any restriction, sharp bend, or rough interior surface gives those fibers a place to cling. Over time, a partially blocked vent raises exhaust temperatures and creates conditions where ignition becomes possible.
The vent system itself, not just the lint trap inside the dryer, is the first line of defense. A well-installed duct moves moist, hot air out of the home efficiently. A poorly installed one turns that air into a slow-building hazard.
Tampa’s Climate Adds a Layer of Complexity
Tampa’s humidity is not just uncomfortable, it actively affects dryer vent performance. When a vent run is too long or contains too many bends, exhaust air cools before it exits the building. In a humid environment like Tampa, that cooling causes moisture to condense inside the duct. Condensation softens lint, causes it to clump, and accelerates blockage far faster than you would see in a drier climate. It can also promote mold growth inside the duct itself.
This means installation standards that might be technically adequate in a drier region can fall short in the Tampa area. Shorter runs, smooth-wall rigid duct, and correctly positioned termination caps all matter more here.
When a Vent Problem Becomes a Structural Problem
Exhaust that cannot exit the building has to go somewhere. In homes where the vent terminates inside a wall cavity, crawl space, or attic rather than at the exterior, that moisture-laden air saturates insulation, promotes rot in wood framing, and creates conditions for mold colonization. This is not a hypothetical scenario. It is one of the more common findings during a professional dryer vent inspection in Tampa homes, particularly in older construction where original installations were never updated to current standards.
What Current Installation Standards Actually Require
Material Requirements: Rigid Metal Is the Standard
The International Residential Code, which Florida adopts with amendments, specifies that dryer exhaust ducts must be constructed of rigid metal or semi-rigid metal duct. Flexible plastic duct, the kind often sold in home improvement stores as a dryer vent kit, does not meet code for the exhaust duct itself. It sags, traps lint at low points, and degrades with heat exposure over time.
Rigid galvanized steel duct with smooth interior walls is the preferred material. It allows lint to pass through rather than accumulate, withstands the heat of dryer exhaust, and holds its shape over the life of the appliance. Semi-rigid aluminum can be used for short connector sections, but the main duct run should be rigid wherever possible.
Length Limits and the Equivalent Length Calculation
Code sets a maximum duct length for dryer exhaust, typically expressed as an equivalent length that accounts for both straight runs and fittings. Each 90-degree elbow reduces the allowable straight-run length because it creates resistance to airflow. A standard installation allows a certain total equivalent length; every elbow and fitting you add subtracts from that budget.
Here is a simplified way to think about the tradeoffs:
| Fitting Type | Approximate Equivalent Length Deducted | Impact on Allowable Run |
|---|---|---|
| 90-degree elbow (rigid) | 5 feet | Moderate |
| 45-degree elbow (rigid) | 2.5 feet | Low |
| Transition connector (semi-rigid) | Varies by length | Low to moderate |
| Louvered termination cap | Up to 5 feet (varies by model) | Moderate |
The actual allowable equivalent length in your jurisdiction may differ. Always verify with your local building department or a licensed professional, since Florida’s adopted amendments can modify base IRC requirements.
Termination Location and Cap Design
The vent must terminate at the exterior of the building, never into an attic, crawl space, garage, or wall cavity. The termination cap must have a backdraft damper to prevent outside air from entering when the dryer is off, and it must not have a screen, which traps lint and causes rapid blockage.
In Tampa, termination height and location relative to windows, doors, and HVAC intakes also matter. Exhaust discharged too close to an air handler intake recirculates lint and moisture back into the home’s air system, creating a secondary problem that is easy to miss until it shows up as reduced HVAC efficiency or air quality issues.
Signs Your Current Installation Does Not Meet Standards
Performance Symptoms That Point to a Vent Problem
A clothes dryer that suddenly needs extra cycles to dry a normal load is one of the clearest signals that airflow is restricted. Other performance signs include:
- The dryer cabinet feels unusually hot to the touch during operation
- Laundry comes out hotter than normal but still damp
- A burning or musty smell during or after a cycle
- The laundry room feels more humid than usual while the dryer runs
- The exterior termination cap flap does not open fully during operation
None of these symptoms require a professional to notice. They are observable during a normal laundry cycle and worth taking seriously rather than attributing to an aging appliance.
Visual Red Flags During a Basic Inspection
Pull the dryer away from the wall and look at the connector section. Flexible plastic accordion duct is a non-compliant material and a common finding in Tampa homes, particularly those built or renovated before current code cycles. Kinked or compressed flexible duct at the back of the dryer is another common problem, often caused by pushing the appliance too close to the wall after installation.
Check the exterior termination cap. If it is covered with a screen, that screen needs to come off. If the cap is damaged, missing its damper flap, or positioned where vegetation or a fence blocks airflow, those are installation deficiencies that affect both safety and performance.
When the Problem Is Hidden Inside the Wall
The most serious installation problems are the ones you cannot see. Duct runs inside wall cavities, floor joists, or attic spaces may have been installed with plastic duct, may have disconnected joints that exhaust directly into the building cavity, or may have accumulated years of lint without ever being cleaned. A professional dryer vent inspection is the only reliable way to assess what is happening inside those concealed sections.
Dryer Vent Repair vs. Full Reinstallation: How to Decide
Repairs That Address Specific Deficiencies
Not every problem requires tearing out an entire duct run. Dryer vent repair is appropriate when the issue is localized: a disconnected joint in an accessible section, a damaged termination cap, a kinked connector behind the dryer, or a screen that needs removal. These are targeted fixes that restore code compliance without major disruption.
Repair also makes sense when the overall routing is sound but a specific component has failed. A backdraft damper that no longer closes, for example, is a straightforward replacement that a technician can complete in a short visit.
When Reinstallation Is the Right Call
Full reinstallation becomes necessary when the existing route is fundamentally non-compliant. Common scenarios in Tampa homes include:
- The entire run is plastic flexible duct and must be replaced with rigid metal
- The duct terminates inside the building rather than at the exterior
- The route includes so many bends that the equivalent length exceeds code limits
- The duct passes through a conditioned space in a way that creates condensation problems
- A home renovation changed the layout and the original route no longer works
Reinstallation is also worth considering when a dryer is being relocated, such as during a laundry room remodel, since it is far more cost-effective to route the new duct correctly from the start than to retrofit a substandard path later.
The Role of Dryer Vent Cleaning in the Process
Whether you are repairing or reinstalling, a thorough cleaning should be part of the process. Lint that has accumulated in an existing duct does not disappear when you fix the downstream problem. Cleaning removes the accumulated debris before it can re-restrict airflow or create a fire risk in a newly corrected system. For Tampa homeowners, professional dryer vent cleaning at regular intervals, typically once per year for an average household, is the maintenance step that keeps a correctly installed system performing as it should.
The Installation Process: What a Professional Does That a DIY Kit Cannot
Planning the Route Before Cutting Anything
A qualified technician starts by mapping the shortest compliant path from the dryer location to the exterior. This involves identifying obstacles inside walls and floors, calculating the equivalent length with all planned fittings, and confirming the termination location meets clearance requirements. That planning step is where most DIY installations go wrong. A homeowner following kit instructions focuses on connecting point A to point B. A professional focuses on whether the resulting system will actually perform safely over its service life.
Sealing Joints and Securing the Run
Each joint in a rigid duct run must be mechanically fastened and sealed with foil tape rated for dryer exhaust. Standard duct tape is not appropriate for this application because it degrades with heat cycling. Joints that are not properly sealed allow exhaust to leak into wall cavities, which brings back the moisture and lint-in-the-structure problems discussed earlier.
The duct also needs to be supported at regular intervals to prevent sagging, particularly in longer horizontal runs. A sagging duct creates a low point where condensation and lint accumulate, exactly the condition that leads to blockage and potential ignition.
Testing Airflow After Installation
A complete installation includes verifying that the system actually moves air at the volume and velocity the dryer requires. Technicians use a manometer or anemometer to measure airflow at the termination point. If the reading falls below the dryer manufacturer’s specifications, the installation has a restriction somewhere that needs to be identified and corrected before the job is complete. This step is rarely included in a DIY installation and is one of the clearest differentiators between a compliant installation and one that merely looks finished.
Maintaining Compliance After Installation
Annual Cleaning as a Code-Adjacent Practice
Building codes govern installation, not ongoing maintenance schedules. But the National Fire Protection Association’s NFPA 211 standard, along with most dryer manufacturers, recommends cleaning the exhaust duct at least once per year. For Tampa households with high laundry volume, multiple occupants, or pets that shed heavily, more frequent cleaning may be appropriate.
Ecovent Dryer Duct Solutions serves Tampa homeowners with both installation and ongoing maintenance, making it straightforward to keep a compliant system in good working order without coordinating multiple contractors.
What Changes After a Major Appliance Swap
Replacing a dryer is a common trigger for discovering that the existing vent system does not meet current standards. New appliances often have different exhaust requirements than older models, and a vent that worked adequately with a ten-year-old dryer may restrict airflow for a newer, higher-capacity machine. Any time a new dryer is installed, it is worth having the vent system evaluated rather than assuming the existing route is still appropriate.
Permits and Inspections in Tampa
Whether a dryer vent installation requires a permit in Tampa depends on the scope of work and whether it involves structural penetrations or work inside wall cavities. Requirements vary, and the answer is not always obvious. The safest approach is to ask your contractor before work begins, and to verify with Hillsborough County’s building department if you are uncertain. A licensed professional familiar with local requirements can navigate that process on your behalf. Never assume a permit is not required simply because the work seems minor.
Frequently Asked Questions
How long should a dryer vent run be?
Most codes allow a maximum equivalent length of 25 feet for the exhaust duct, with deductions for each elbow and fitting. The actual limit depends on your jurisdiction and the specific dryer model. Florida may apply amendments to the base IRC requirement, so confirm with a licensed professional or your local building department before installation.
Can I use flexible plastic duct for my dryer vent?
No. Flexible plastic duct does not meet current code requirements for dryer exhaust. It traps lint, degrades with heat, and presents a fire risk. Rigid galvanized steel duct is the standard material for the main run, with semi-rigid aluminum acceptable for short connector sections.
How often should I have my dryer vent cleaned in Tampa?
Once per year is the general recommendation for average households. Tampa’s humidity accelerates lint buildup and condensation inside ducts, so homes with high laundry volume, pets, or longer duct runs may benefit from more frequent cleaning.
What is the difference between dryer vent repair and reinstallation?
Repair addresses a specific, localized deficiency such as a disconnected joint, damaged cap, or kinked connector. Reinstallation is appropriate when the overall route is non-compliant, uses prohibited materials, or terminates in the wrong location. A professional inspection can determine which approach applies to your situation.
Does a dryer vent termination cap need a screen?
No. Screens on dryer vent termination caps trap lint rapidly and cause blockages. The cap should have a backdraft damper flap but no screen. If your current cap has a screen, it should be removed or the cap replaced.
Do I need a permit to install or replace a dryer vent in Tampa?
It depends on the scope of work. Installations involving wall penetrations or work inside structural cavities often require a permit in Hillsborough County. Check with your local building department or ask your contractor before starting any work.
The Bottom Line for Tampa Homeowners
A dryer vent that was installed quickly, cheaply, or without regard for current standards is not a minor inconvenience. It is a system that works against the appliance it is supposed to support, introduces moisture into your home’s structure, and in the worst cases creates conditions for a fire. Tampa’s climate makes the margin for error smaller, not larger, which is why installation quality and regular maintenance matter more here than in many other markets.
Ecovent Dryer Duct Solutions handles the full range of dryer duct work for Tampa homeowners, from inspections and cleaning to repair and complete reinstallation. If you are not certain your current setup meets code or is performing safely, the right move is to get it evaluated by someone who knows what compliant installation actually looks like. Schedule your dryer vent inspection with Ecovent today and get a clear picture of where your system stands before a small problem becomes a costly one.